

cylonchaney
-
Posts
1,037 -
Joined
-
Last visited
Content Type
Profiles
Forums
Events
Everything posted by cylonchaney
-
Those are cool! Reminds me I've been thinking for a while of making a Goro.
-
Idk about 7. But I'd buy more than one.
-
 Love the Superman variants and PP Punisher! Well done.
 -
You are a much better photographer than I.
-
So creative. I really like Vostok.
-
So they're considering a Skystriker. Excellent idea Zach! I'm not a Marvel guy. Have to get my rampant speculation and wild inferences in somewhere. LOL
-
Nice work. Those all look great! I especially like Ultraman.
-
cylonchaney's custom figures
cylonchaney replied to cylonchaney's topic in Custom Creations & Artwork!
I made this guy back at the beginning of the pandemic. I started working from home which was great for larger 3d prints. Some of the pieces for this guy took 20 hours to print. Started the print before work and it finished at bedtime. I bet the entire figure took close to a week of print hours. Giant Man is 10X scale and about 20" tall. The decals are from the decal thread here on the multiverse. His face is somewhat pixelated from being upscaled so much. The 3 story lego building has an extra row of bricks on each layer to better fit minimates and he towers over it. Giant Man is the largest figure i have printed. Theoretically I could still go twice as tall. Stickers start to become a problem at larger sizes. A little bigger than Giant Man and I'd have to start splitting stickers across multiple sheets and try to line them up when applying. That sounds like not fun. -
I think this is exactly how many customizer gets started. Unsatisfied wants. I really wanted more vehicles.
-
I meant I should have put a smiley on mine. Let's stop not fighting. It's like those super-polite cartoon chipmunks. LOL PS I hope this post does not offend.
-
All good. Should have put a smiley on my reply as well.
-
Definitely not attacked.
-
That sounds like a call for one of my favorite things on the board, rampant speculation. And reading hidden messages in Zach's words (that he never intended). 🤣
-
Bronze Meddling Wave 6: Villains for Hire [pg12]
cylonchaney replied to elhonez's topic in Custom Creations & Artwork!
Those look great. -
cylonchaney's custom figures
cylonchaney replied to cylonchaney's topic in Custom Creations & Artwork!
Thanks for the kind words everyone. For those of you into 3d printing, I cannot stress enough how much more satisfying the hobby is when you start designing your own stuff. It took me a long time to get here but within a month of getting my first printer, I had designed and printed a Minimate compatible head. It's an easy start. For a basic head, you just need to subtract one cylinder from another. This is a pretty easy task to learn in any 3d software. The tool I use mostly is code based and free. You can get it at https://www.openscad.org. The idea that I can visualize something and then have a workflow to make it a physical object just blows my mind sometimes. Here's an example of a simple Minimate style head in openscad. But it's easy enough to learn this technique in any 3d software. Google your tool of choice plus "boolean operation" and you'll find tutorials on how to add and subtract objects from each other. Please note, // precedes a comment in the code. The rest of the line is ignored when running. // $fn=X sets the number of facets for cylinders // higher number = more detail but takes longer $fn=100; // difference means cut the subsequent objects // from the first one difference() { // base head shape cylinder(r=5.5, h=10, center=true); // cut out smaller cylinder for peg hole translate([0,0,-7]) cylinder(r=2.55,h=7); } Without all the commenting, it's quite simple $fn=100; difference() { cylinder(r=5.5, h=10, center=true); translate([0,0,-7]) cylinder(r=2.55,h=7); } PS In the sample above 'translate' means move in x,y,z coordinates. So the statement says move the second cylinder down 7mm before cutting it from the first one. -
cylonchaney's custom figures
cylonchaney replied to cylonchaney's topic in Custom Creations & Artwork!
The smallest is 1X scale. Approximately the height of a standard Minimate. Then we go up 1.25X, 1.5X, 2X, 3X, 4X. For female hairpieces, I've downloaded a few Lego hairpieces and customized a head to fit them. You can kind of see the start of the rounding on a couple where the hairpiece is not fully seated. -
cylonchaney's custom figures
cylonchaney replied to cylonchaney's topic in Custom Creations & Artwork!
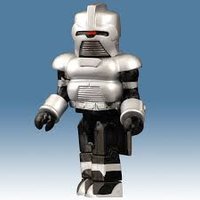
Wolverine is a factory Minimate. Colossus and the Sentinels are my block figure design. Sentinels are 3X and 5X scale. 6" and 10" tall. The 3X ones mostly have LED eyes with on/off switch, dimmer, and battery inside the head. I may want to get rid of a couple of these at some point. They have alternate heads with a purely printed face because I don't like how dark the LEDs look when they're turned off. Again, my photography skills hurt this one. The purple guys have a nice red glow to their eyes in real life and the blue ones have yellow. It's almost too washed out to see in the photo. -
cylonchaney's custom figures
cylonchaney replied to cylonchaney's topic in Custom Creations & Artwork!
OK. Here we go. Bear in mind this is about 7 year old work. I think some of you will like the subject if not the execution. "If at first you don't succeed ..." Can't have shoot in this apartment without Kor photobombing at some point. Tri-Sentinel is printed at 6X scale so about 12". He's a little taller because of things like boots, helmet, lower arms attachment, etc. I ran out of the purple and never did find a good colour match for it. That's one of the reasons I never improved him. He looks OK at the back of my shelf so not that much interest either. Been meaning to share a photo for years though. -
cylonchaney's custom figures
cylonchaney replied to cylonchaney's topic in Custom Creations & Artwork!
I have another project where I made a prototype probably about 7 years ago. It kind of sucks but I don't know when I'll get around to fixing it. I meant to revisit the project and redesign some pieces but for various reasons it never happened. I've been meaning to take and post a photo for a couple of years now. But as I say, I'm way more into designing and making things than in taking photos and showing. So anyway, to hopefully force myself to finally take and post a photo today, here is a teaser tagline @elhonez style. "If at first you don't succeed ... " -
cylonchaney's vehicle customs
cylonchaney replied to cylonchaney's topic in Custom Creations & Artwork!
Thanks for the positivity guys. It's always appreciated. It will probably be summer by the time I finish it enough to print. Still a lot of detail to go and I'm less motivated now. But I do want to own the finished thing so I'll get there eventually. I mentioned in an earlier post, there's an art to cutting up your design for 3d printing. For my stuff, I want the layer lines to all be on the same plane and the cleanest finish possible. I add things like slots and tabs so wings will be symmetrical. I try to also consider where seams will be. Ideally, where there's already a line. To answer your question, yes it will be printed in separate parts and assembled. At a minimum, everything functional or hinged has to be a separate piece. Canopies, doors, wheels, that kind of thing. The tail will most certainly be split off for printing. Once I've done all the cuts that make sense, if the rest of the main body is too big for my printer, I will cut it into smaller pieces. Or if I think I can end up with a nicer surface by cutting it further I will do that. This will be the first project where the ship body may be too big for my print bed which is 220 mm or 8" square approximately. My previous designs are each up in the neighbourhood of 20 separate parts to print. This one has 44 missiles alone. So it will be lots of printing. And lots of printing time. I can count up in my head about 30 separate printed parts requried. Probably closer to 40. Still working on Trek ships. I think I'm going to do a Reliant. Possibly a ship for every captain. There's a "choppa" I really need to get to. LOL And recently I've been thinking about a car base and a Charger body for it as another project. And I really need to get around to taking some photos of some of my more secretive projects. I've got stuff that's been on my shelf for years but I just haven't got around to taking a pic. -
HappyBirthday Luke!
-
cylonchaney's vehicle customs
cylonchaney replied to cylonchaney's topic in Custom Creations & Artwork!
Progress continues slowly these days but it continues. This is going to be my most detailed work yet, including actual seats in the cockpit. Still working on all the hinged parts currently. I think this sucker is going to measure about 18" long when built. -
cylonchaney's vehicle customs
cylonchaney replied to cylonchaney's topic in Custom Creations & Artwork!
-
cylonchaney's vehicle customs
cylonchaney replied to cylonchaney's topic in Custom Creations & Artwork!
All of the fun part of the dropship is out of the way and I'm slowing down. I'm happy with the resemblance. Now it's all the less fun detail stuff. The weapons pods need hinges. I need to carve out the canopy and create hinge. Hinge for the ramp. Cockpit seats. I may have it open into the cargo area. Headlights. For once, I will make the landing gear more detailed. None of this is as fun as the early design stages when every step seems to bring you much closer. And then there's still chopping it up for 3d printing. Anyway, I'll get there eventually. Meanwhile, I've been working on my TOS Trek stuff as well. I incorporated a new technique to get more organic shapes into my models. Basically I traced over part of the secondary hull in Inkscape and output a SVG file. I can pull that into openSCAD and rotate it 360 degrees to make a solid shape. I'm going to try the same technique to get a better looking saucer / primary hull. -
Masters of the Universe Minimates!!!!!
cylonchaney replied to MisterMiracle's topic in TV, Movie, & Video Game Minimates
I'd love MOTU mates.